Ihr erstes Display verbinden
Verbinden Sie Ihren ersten Bildschirm mit Bildschirm hinzufügen in easyCMS Studio. Installieren Sie den Player, geben Sie die CMS-Adresse und den Schlüssel aus Ihrer Willkommens-E-Mail ein, benennen Sie dann den Bildschirm und drücken Sie Verbinden.
Player schon installiert? Beanspruchen Sie den Bildschirm hier — Sie müssen sich in derselben Internetverbindung wie er befinden.
Ein Display ist jeder Bildschirm, auf dem der easyCMS-Player läuft: eine Android-Box an einem HDMI-Anschluss, ein PC hinter einem Monitor oder ein professionelles Display, auf dem der Player selbst läuft. Sie verbinden es selbst mit Bildschirm hinzufügen in easyCMS Studio, in wenigen Minuten.
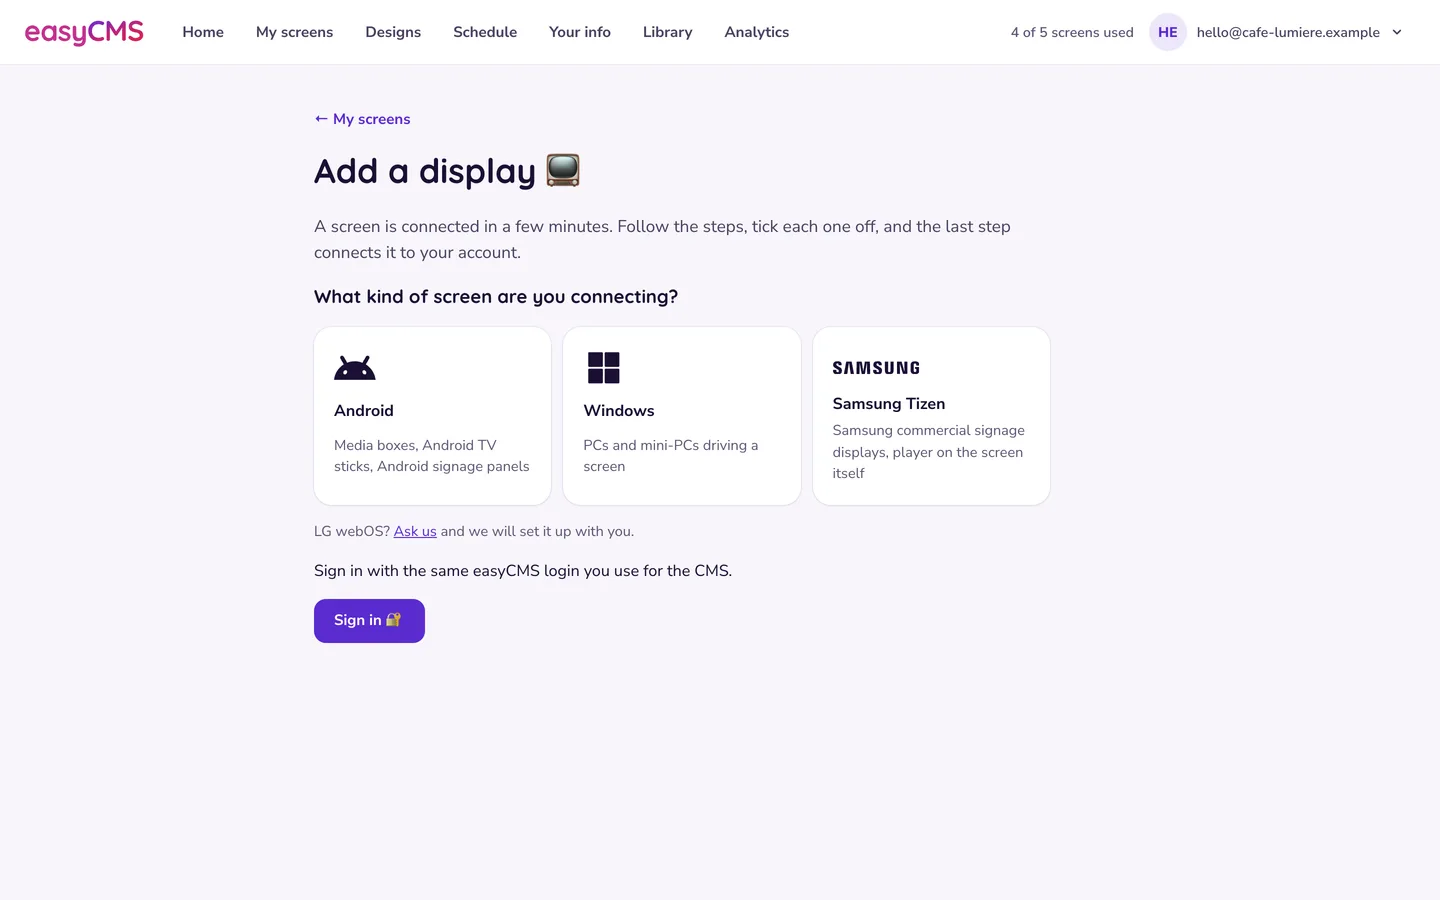 Bildschirm hinzufügen fragt, welche Art von Bildschirm Sie verbinden, und zeigt dann die Schritte einzeln an.
Was Sie brauchen
- Ihre CMS-Adresse (https://app.myeasycms.com) und Ihr CMS-Schlüssel, aus Ihrer Willkommens-E-Mail. Bildschirm hinzufügen zeigt sie auch an, sobald Sie angemeldet sind. E-Mail verloren? Fragen Sie uns.
- Das Player-Gerät, eingeschaltet und online.
- Eine freie Lizenz. Ihr Konto enthält eine; weitere lebenslange Lizenzen kosten je 99€.
- Ein Telefon oder Computer mit derselben Internetverbindung wie der Bildschirm. Das ist nicht optional.
Wir empfehlen Android, außer Sie haben bereits einen PC hinter dem Bildschirm (Windows). Die Installationsdateien finden Sie auf der Download-Seite.
In Studio verbinden
- Öffnen Sie in Studio Meine Bildschirme und tippen Sie auf Bildschirm hinzufügen.
- Wählen Sie unter Welche Art von Bildschirm verbinden Sie? Android, Windows oder Samsung Tizen. Für LG webOS fragen Sie uns, wir richten es gemeinsam mit Ihnen ein.
- Folgen Sie den Schritten (Player installieren, CMS-Adresse und Schlüssel eingeben) und drücken Sie nach jedem Erledigt, nächster Schritt.
- Melden Sie sich mit Ihren easyCMS-Zugangsdaten an und warten Sie dann: Es kann einige Minuten dauern, bis sich der Player meldet. Lassen Sie den Bildschirm eingeschaltet und die Seite geöffnet.
- Wenn der Bildschirm erscheint, geben Sie einen Namen in Benennen Sie ihn, z. B. Bildschirm Empfang ein und drücken Sie Verbinden. Er zeigt Verbunden ✅.
- Android: Drücken Sie am Player noch einmal Verbinden. Windows: Starten Sie den Player neu. Samsung Tizen: Geben Sie ihm ein paar Minuten. Diesen Schritt übersehen viele.
Nach ein bis zwei Minuten zeigt der Bildschirm das Standard-Layout von easyCMS: Alles hat geklappt. Die Seite Display hinzufügen auf unserer Website ist derselbe Ablauf, falls Sie sie bevorzugen.
Achtung Wählen Sie bei Android und Samsung Tizen Manuell konfigurieren: Der Aktivierungscode, den der Player anbietet, funktioniert mit easyCMS nicht. Geben Sie die Adresse vollständig ein, mit
https://.
Alle Details je Player: Android, Windows, Samsung Tizen, andere Player.
Wenn nichts erscheint
- Unterschiedliche Verbindungen. WLAN vor Ort gegenüber mobilen Daten, oder ein separates Gästenetz. Bringen Sie beide ins selbe Netz und laden Sie die Seite neu.
- Mehrere neue Bildschirme aufgeführt. Jede Zeile zeigt dann die letzten vier Zeichen der MAC-Adresse des Bildschirms. Öffnen Sie die erweiterten Details des Players (siehe das Player-Statusfenster) und wählen Sie die passende Zeile.
- „That display is no longer available to claim.“ Er wurde bereits beansprucht oder ist aus der Liste verschwunden, während die Seite offen war. Starten Sie den Player neu, lassen Sie ihn sich melden, laden Sie die Seite neu.
- Immer noch nichts. Senden Sie uns eine Support-Anfrage, und wir verbinden den Bildschirm von unserer Seite aus.
Lizenzen
Das Verbinden eines Bildschirms belegt eine Ihrer easyCMS-Lizenzen, die nie ablaufen. Sind alle belegt, meldet Studio, dass ein neuer Bildschirm eine weitere Lizenz braucht, mit einem Link Lizenz hinzufügen. Um die Lizenz eines ausgemusterten Bildschirms wiederzuverwenden, bitten Sie uns, ihn zu deautorisieren. Löschen Sie nie ein Display, um eine Lizenz freizugeben: Das ist unumkehrbar und gibt nichts frei.
Android-, LG-webOS- und Samsung-Tizen-Player haben außerdem eine kommerzielle Player-Lizenz, deren Code in Ihrer Kaufbestätigungs-E-Mail steht. Sie prüft sich alle 30 Tage selbst erneut; siehe Fehler bei der Player-Lizenz.
Als Nächstes: Geben Sie ihm etwas zum Anzeigen
Tippen Sie in Meine Bildschirme beim neuen Bildschirm auf Ändern, was läuft, wählen Sie ein Design und drücken Sie Senden mit Immer. Siehe Ihr erstes Design und Ihr Design auf einen Bildschirm bringen.
Sehen Sie es sich an: Installation des Players und eine Einführung in easyCMS.
Verwandte Artikel: Ihr erstes Design, Ein neues Display zu Ihrem Konto hinzufügen, Display-Lizenzen und Autorisierung, Display wird als offline angezeigt