Android-Player-Einrichtung
Installation und Konfiguration des easyCMS-Android-Players für Digital Signage: Geräteanforderungen, APK-Installation, CMS-Verbindung und zuverlässiger Kiosk-Betrieb.
Diese Anleitung bringt eine Android-Box oder einen Android-Signage-Bildschirm vom Karton bis zur Wiedergabe Ihrer Inhalte. Sie brauchen das Gerät in Ihrem Netzwerk, Ihre CMS-Adresse und Ihren Schlüssel aus der Willkommens-E-Mail sowie ein Telefon oder einen Computer an derselben Internetverbindung.
Bildschirm hinzufügen in easyCMS Studio zeigt dieselben Schritte einzeln, nach der Anmeldung mit Ihrer CMS-Adresse und Ihrem Schlüssel, findet dann den Bildschirm und verbindet ihn.
Das Gerät vorbereiten
Wählen Sie dedizierte Player-Hardware statt eines billigen TV-Sticks: Digital Signage läuft 24/7, und günstige Boxen überhitzen und ruckeln. Android 9 oder neuer, ein Quad-Core-Prozessor und 2GB+ RAM schaffen Full HD; 4K braucht stärkere Hardware. Wir können Ihnen auch fertig eingerichtete Player liefern.
- Verbinden Sie das Gerät mit Ihrem Netzwerk. Ethernet ist zuverlässiger als WLAN.
- Prüfen Sie Datum, Uhrzeit und Zeitzone: Die Zeitplanung hängt von der Uhr des Players ab.
- Seien Sie bereit, Apps außerhalb des Stores zuzulassen („Unbekannte Quellen“ oder „Unbekannte Apps installieren“). Android fragt während der Installation danach.
Player installieren
-
Öffnen Sie auf dem Gerät den Webbrowser (Chrome oder den Browser, der auf der Box vorinstalliert ist) und geben Sie
myeasycms.com/apkin die Adressleiste ein. Sie führt immer zum aktuellen Android-Player, daher startet der Download sofort.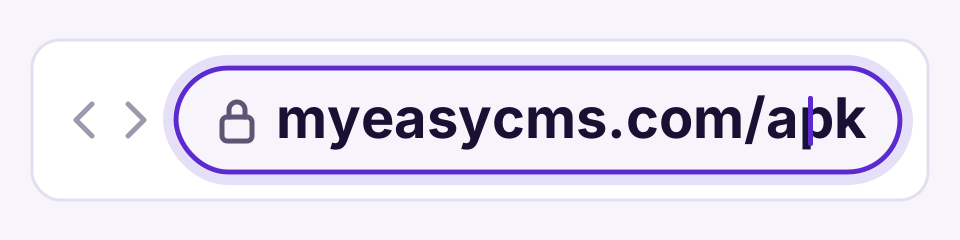
-
Öffnen Sie die heruntergeladene Datei über die Download-Benachrichtigung des Browsers oder seine Download-Liste und tippen Sie auf Installieren. Beim ersten Mal fragt Android, ob Installationen aus dem Browser erlaubt werden sollen: Erlauben Sie es, gehen Sie zurück, und die Installation läuft weiter. Diese Berechtigung können Sie danach wieder ausschalten.
-
Tippen Sie nach Abschluss auf Öffnen.
-
Der Player fragt nacheinander nach zwei Android-Berechtigungen. Tippen Sie bei beiden auf Zulassen:
- Auf Fotos, Medien und Dateien zugreifen: Der Player speichert Ihre Inhalte auf dem Gerät zwischen und kann ohne diese Berechtigung nichts abspielen.
- Auf den Standort dieses Geräts zugreifen: Wird für standortbasierte Zeitplanung und Berichte verwendet.
-
Der Player öffnet seinen Verbindungsbildschirm.
Adresse funktioniert nicht oder kein Browser auf der Box? Laden Sie auf einem Computer die APK herunter, kopieren Sie sie auf einen USB-Stick, stecken Sie ihn in die Box und öffnen Sie die Datei über ihren Dateimanager. Machen Sie dann mit Schritt 2 weiter.
Mit easyCMS verbinden
Manche Versionen fragen zuerst nach einer Lizenz-E-Mail; die meisten gehen direkt zum Verbindungsbildschirm, und das ist in Ordnung. Wenn danach gefragt wird, geben Sie licence@myeasycms.com ein.
- Der Player bietet Player aktivieren und Manuell konfigurieren an. Wählen Sie Manuell konfigurieren.
- Geben Sie Ihre CMS-Adresse ein, normalerweise https://app.myeasycms.com, vollständig einschließlich
https://. - Geben Sie Ihren CMS-Schlüssel ein und speichern Sie.
- Der Player meldet, dass er auf die Autorisierung wartet. Das ist so gewollt: Lassen Sie ihn eingeschaltet.
- Öffnen Sie auf einem Telefon oder Computer an derselben Internetverbindung Bildschirm hinzufügen in Studio oder Display hinzufügen und verbinden Sie den Bildschirm. Ihr erstes Display verbinden führt Sie durch die Schritte.
- Drücken Sie am Player noch einmal Verbinden. Diesen Schritt übersehen viele: Der Player holt seine Konfiguration erst beim nächsten Verbindungsversuch ab.
Achtung Der Aktivierungscode (sechs Zeichen, etwa
4EFF15) gehört zu einem anderen Registrierungsdienst und funktioniert nicht mit easyCMS. Zeigt der Bildschirm einen Code, gehen Sie zurück und wählen Sie Manuell konfigurieren.
Innerhalb von ein, zwei Minuten zeigt der Bildschirm das Standard-Layout von easyCMS: Alles hat geklappt. Willkommens-E-Mail verloren? In easyCMS gibt es keine Ansicht, in der Sie den Schlüssel nachsehen können, also fragen Sie uns.
Zwei Lizenzen, beide einmal bezahlt
Die meisten Android-Supportanfragen entstehen, weil diese beiden verwechselt werden.
- Display-Lizenz: wird verwendet, wenn Sie den Bildschirm verbinden. Eine ist in Ihrem Konto enthalten; weitere lebenslange Lizenzen kosten 99€.
- Kommerzielle Player-Lizenz: für die Android-Player-Software, mit dem Code aus Ihrer Kaufbestätigungs-E-Mail. Sie wird etwa alle 30 Tage erneut geprüft; schlägt die Prüfung fehl, spielt der Bildschirm weiter, was er hat, und nimmt stillschweigend nichts Neues mehr an. Siehe Probleme mit der Player-Lizenz.
In Betrieb halten
- Autostart: Schalten Sie die Autostart-Option des Players ein, damit er nach einem Stromausfall neu startet. Bei unbeaufsichtigten Bildschirmen legen Sie ihn als Launcher des Geräts (Start-App) fest.
- Bildschirm immer an: Schalten Sie Ruhezustand und Bildschirmschoner des Geräts aus.
- Hochformat-Bildschirme: Stellen Sie die Drehung in den Einstellungen des Players ein und gestalten Sie passende Layouts im Hochformat.
- Betriebszeiten und Meldeintervall liegen im Einstellungsprofil, das Ihr Konto teilt, daher ändern wir sie zentral. Sagen Sie uns, was Sie brauchen.
Prüfen, ob er abspielt
- Am Bildschirm: Drücken Sie i auf einer angeschlossenen Tastatur, um das Fenster Status zu öffnen. Bei älteren Playern oder ohne Tastatur berühren Sie den Bildschirm oder bewegen eine Maus, um die Aktionsleiste aufzurufen, und wählen Status. Siehe Das Player-Statusfenster verstehen.
- Von überall: Meine Bildschirme in Studio zeigt, ob er online ist; Angaben, dann Neues Bild aufnehmen, zeigt, was er abspielt. Siehe Display-Überwachung.
Bleibt er auf dem Startbildschirm hängen oder erscheint nie in easyCMS? Arbeiten Sie die Checkliste für Offline-Displays durch.
Verwandte Artikel: Android Digital Signage in einem Schritt installieren, Ihr erstes Display verbinden, Display-Überwachung, Display wird als offline angezeigt