Creating a Menu Board for Your Restaurant
Build a restaurant menu board in easyCMS: enter categories, dishes and prices under Menu Boards, drop the ready-made easyCMS Menu Board template on a layout, add your logo, and change prices without touching the design.
A menu board in easyCMS is two separate things. The menu is your categories, dishes and prices, kept under Menu Boards in the Library. The design is a layout that shows one category of that menu on screen. Once both exist, whoever runs the pass updates a price or marks a dish sold out, and nobody opens the design again.
This guide builds the board below from scratch, using the ready-made easyCMS Menu Board template: your logo top left, the category as the heading, an optional photo, and prices lined up in one column.
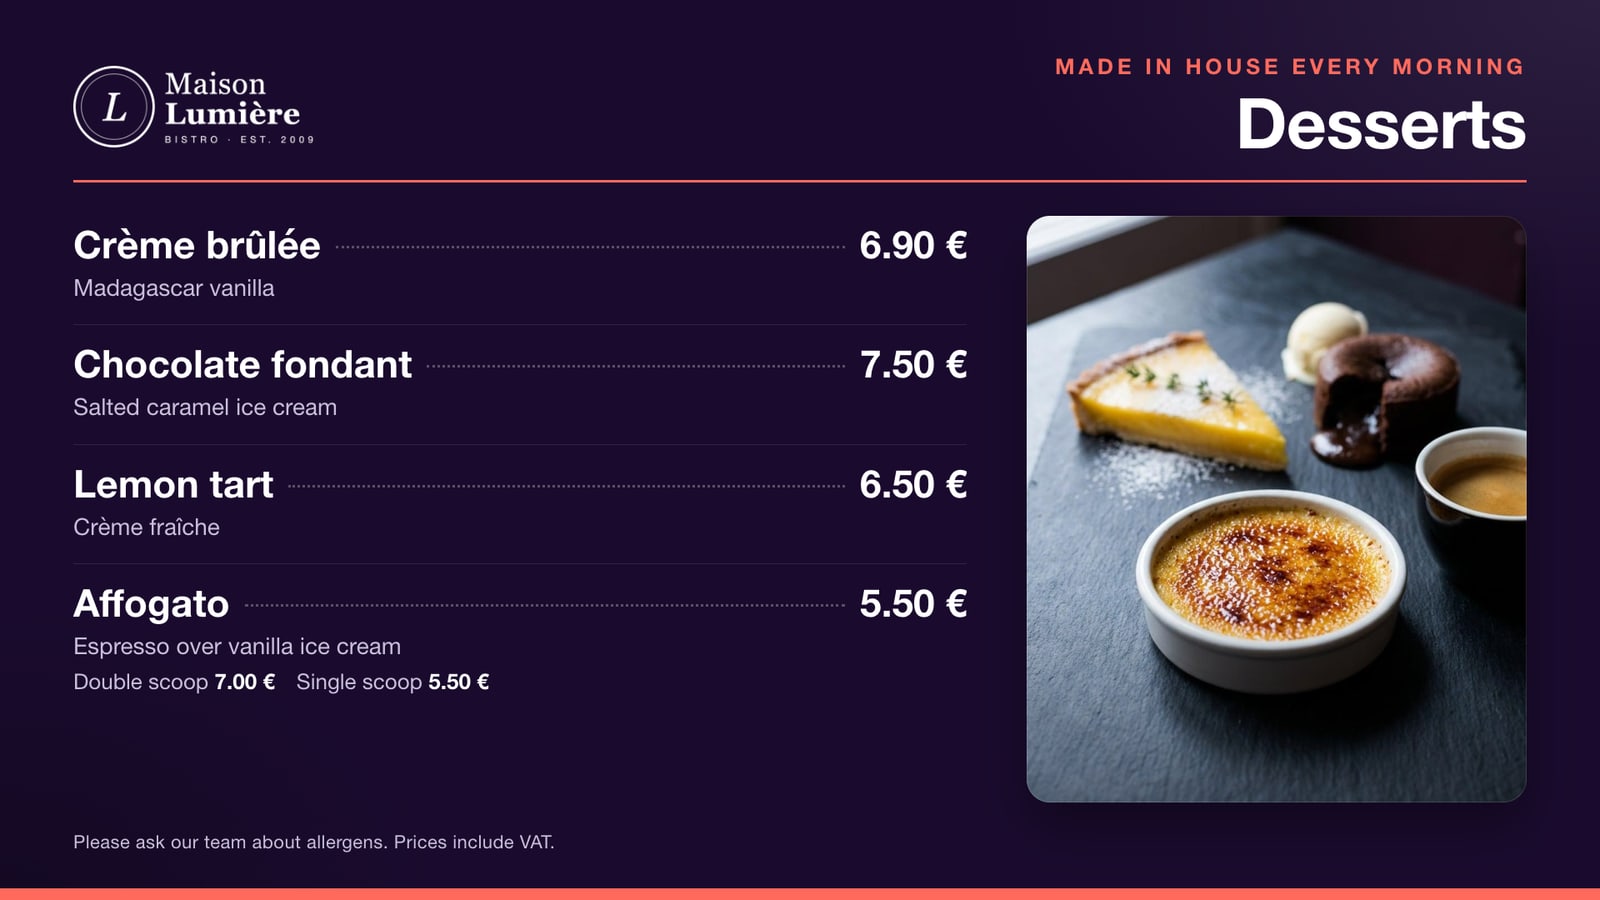 The finished board at 1920 × 1080. Everything on it comes from the menu, except the logo, heading and photo you pick once.
Before you start
- This guide uses easyCMS V4, at app.myeasycms.com. On easyCMS V3 the screens look different and the ready-made template is not available.
- Upload your logo to Library > Media first, as a PNG with a transparent background. Upload any dish photos at the same time. Getting started shows how.
- The template is designed for a landscape Full HD screen, 1920 × 1080. For a portrait screen, see Building your own design further down.
Tip Plan one category per screen. A counter with three screens usually runs Starters, Mains and Desserts side by side, each on its own layout.
Step 1: Create the menu board
- Go to Library > Menu Boards.
- Click Add Menu Board.
- Give it a Name you will recognise, such as “Counter menu”. Code is for integrations and can stay empty. Description is optional and only you see it.
- Click Save.
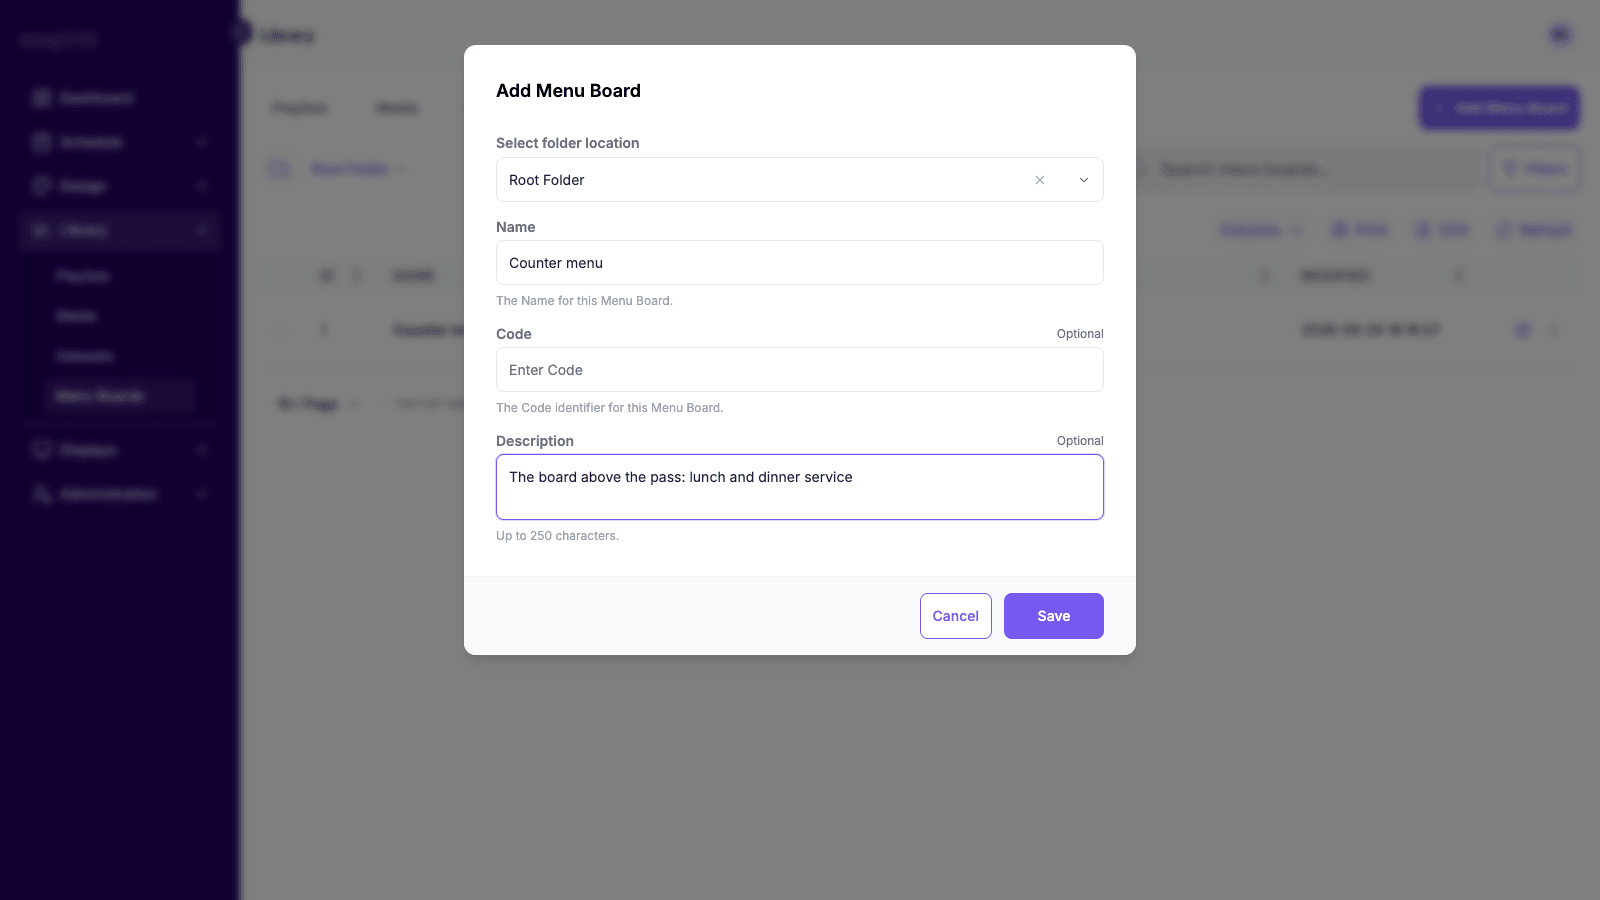 One menu board holds your whole menu. You split it into categories next.
Step 2: Add the categories
- Open the menu board’s row menu, the three dots at the end of its row, and choose View Categories.
- Click Add Category.
- Enter a Name, such as “Desserts”. Description and Media are optional. They are only used if you build your own design.
- Click Next to save it and start the next category straight away, or Save for the last one.
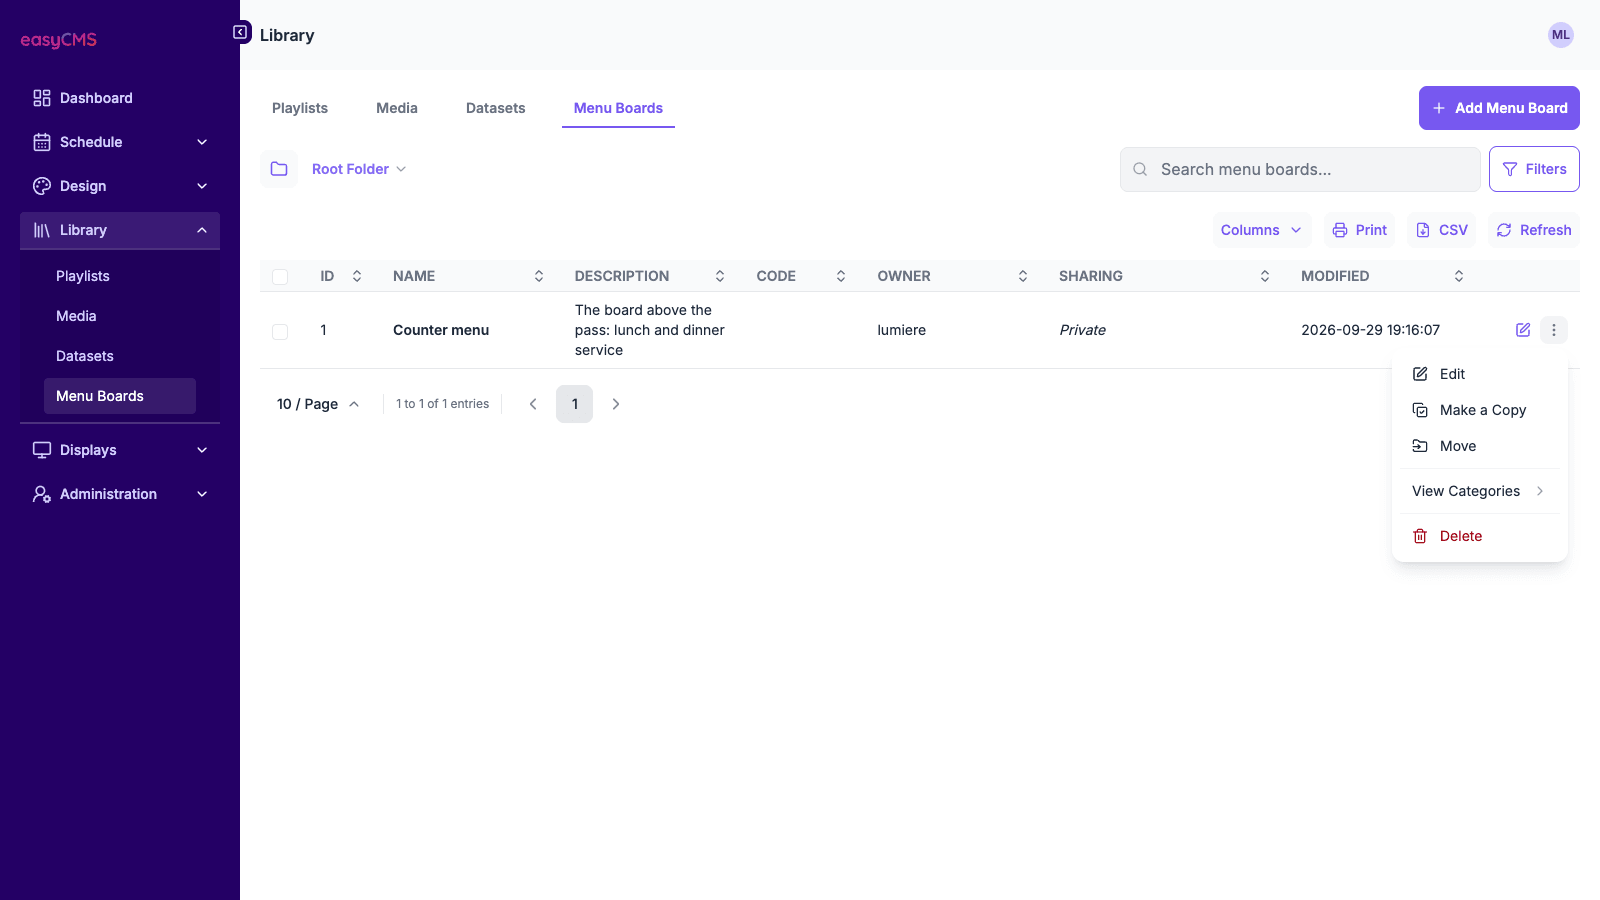 The row menu is where you get from a menu board to its categories.
Step 3: Add the dishes and prices
- On the category list, open the row menu of a category and choose View Products.
- Click Add Product and fill in the General tab:
- Name: the dish as customers should read it.
- Price: the number only, such as 7.90. The template adds the currency symbol.
- Display Order: 1 for the first dish, 2 for the next, and so on. Leave gaps of ten if you expect to slot dishes in later.
- Media: an optional photo of the dish from your Library.
- Availability: leave it On. Switch it off when the dish sells out.
- On the Details tab, add a short Description, the Allergy Information and the Calories if you want them on screen.
- Click Next to save and add another dish, or Save when you are done.
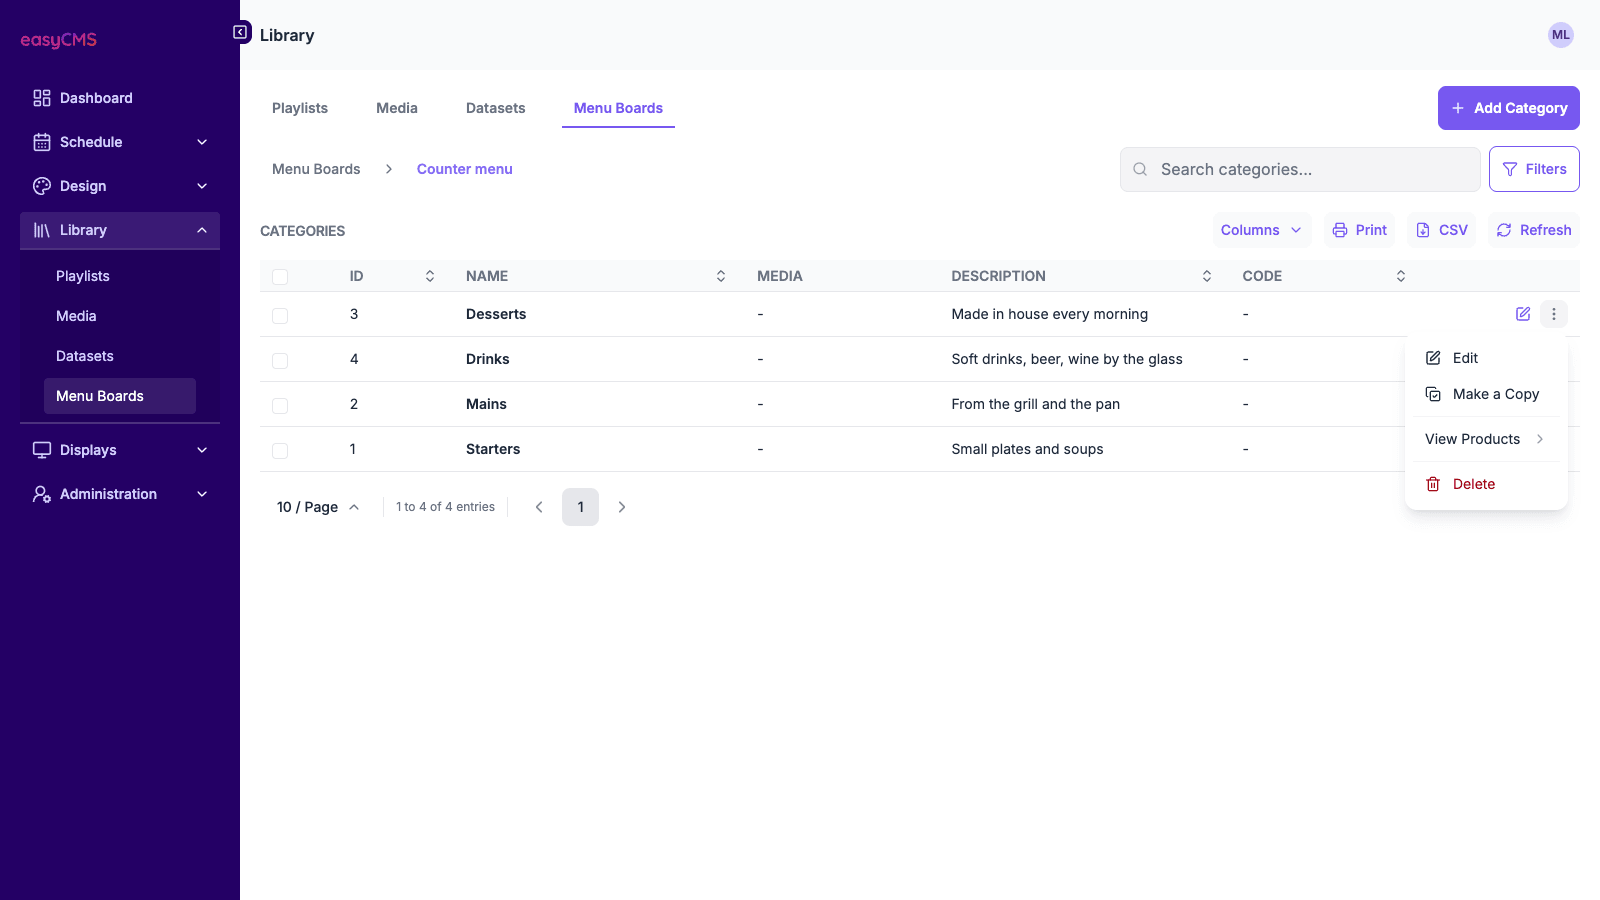 Each category has its own list of dishes, reached through View Products.
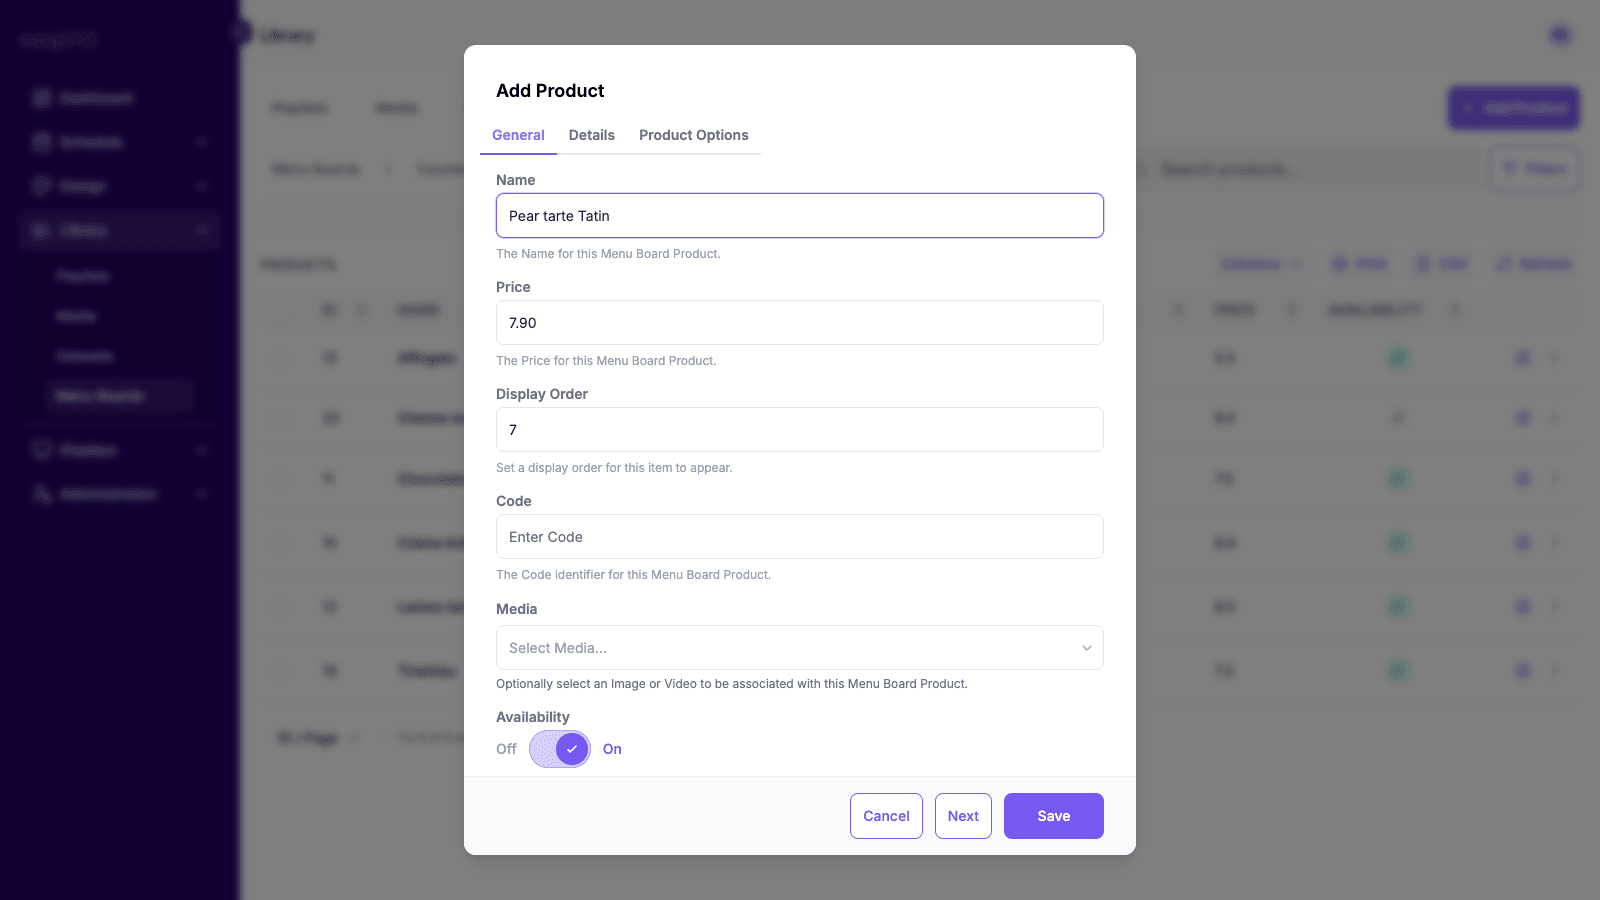 Enter prices as plain numbers. How they look on screen is set once, in the template.
Sizes and extras
The Product Options tab holds variations with their own price: a single or double scoop, a small or large glass, an extra topping. Each option is a name and a price, and + adds another row.
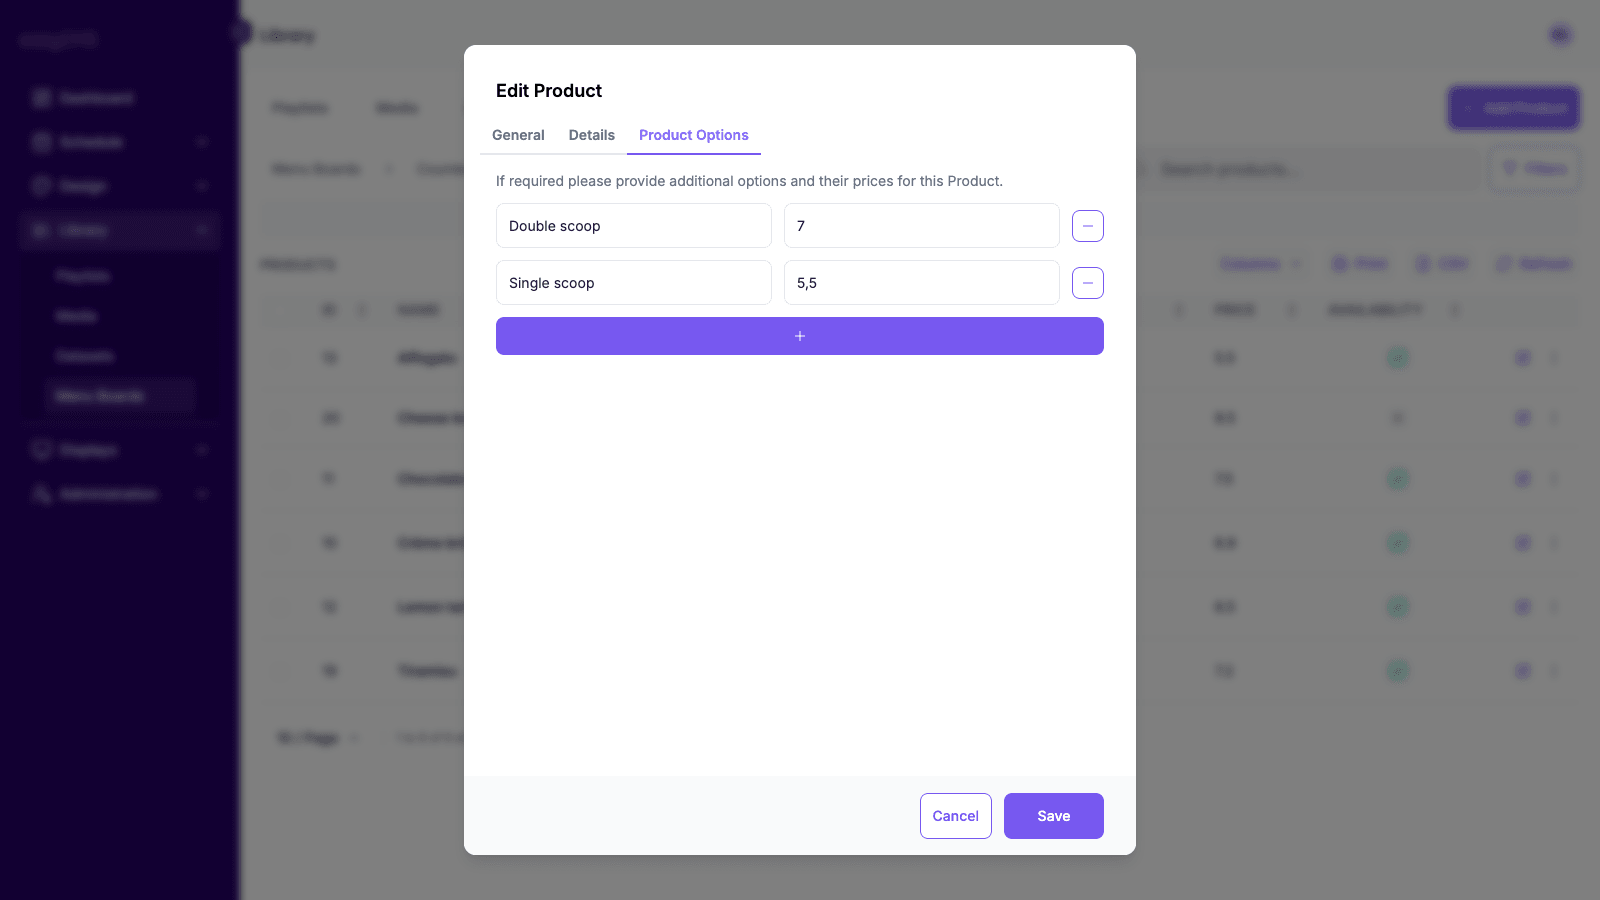 Options appear on screen under the dish, each with its price.
Options appear in alphabetical order of their names. To control the order, start the names with what should sort first, such as “1 scoop” and “2 scoops”.
Checking the list
The products list shows every dish in the category, with tabs along the top to switch between categories. The Availability column shows at a glance what is on and what is sold out.
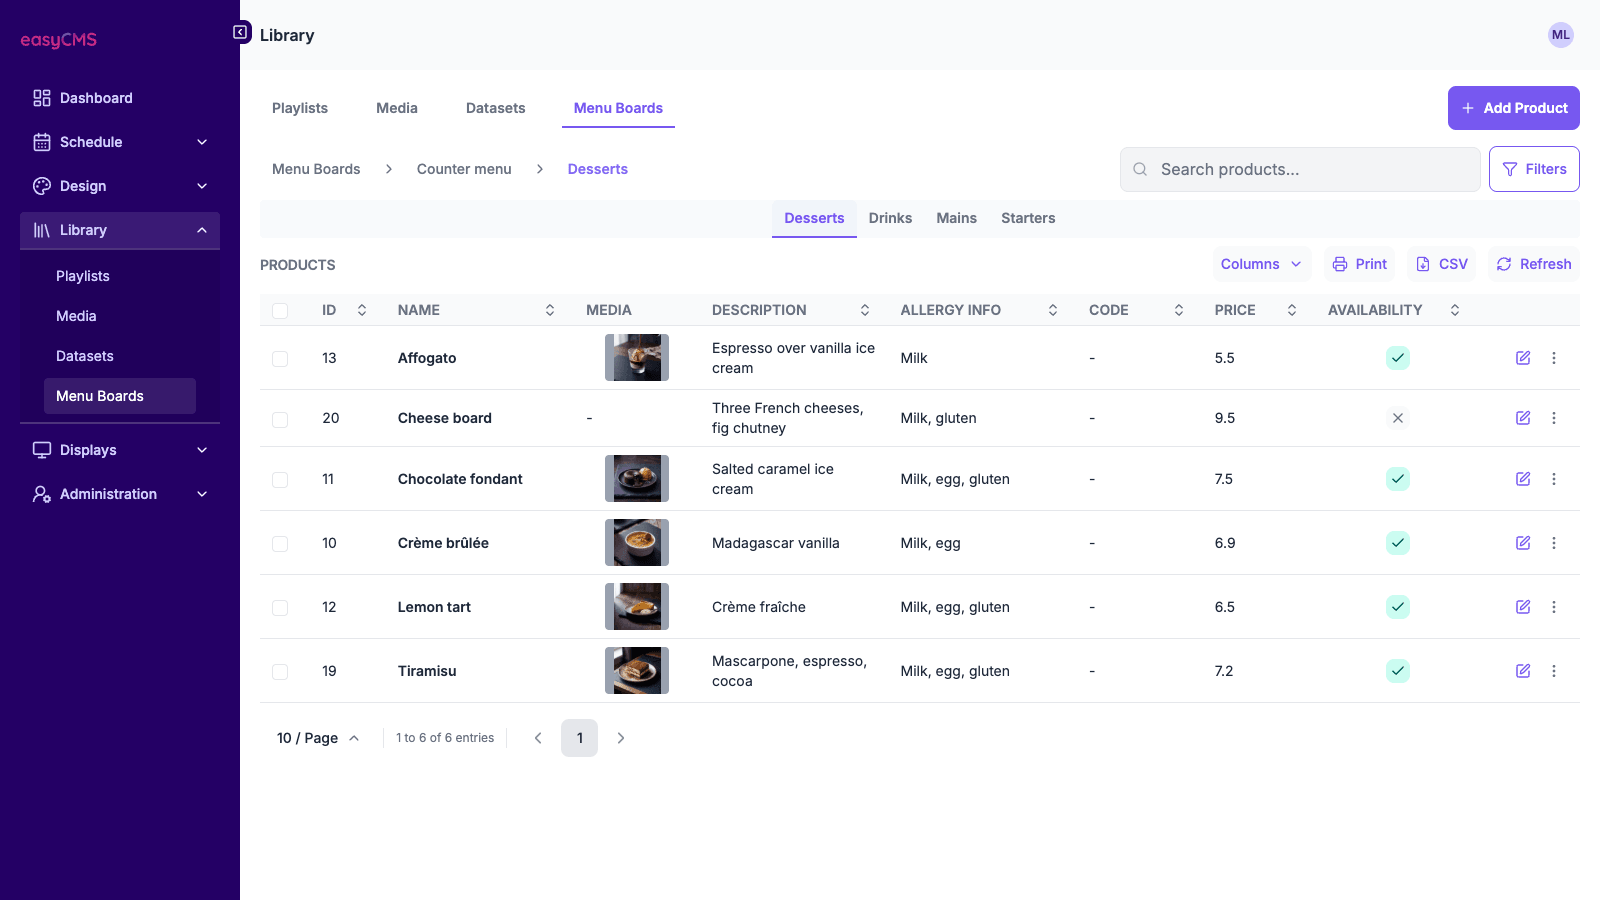 A cross in the Availability column means the dish is switched off.
Step 4: Put the menu on a layout
Create a layout at Design > Layouts with Add Layout, and name it after the screen, such as “Counter menu - Desserts”. Leave the Resolution at 1080p HD Landscape. Your first layout explains the editor if it is new to you.
Add the template
- Open the Toolbox, the top icon on the left edge of the editor.
- Under Data Widgets, click the small arrow on the Menu Board: Products card.
- Under Static Templates, drag easyCMS Menu Board onto the canvas.
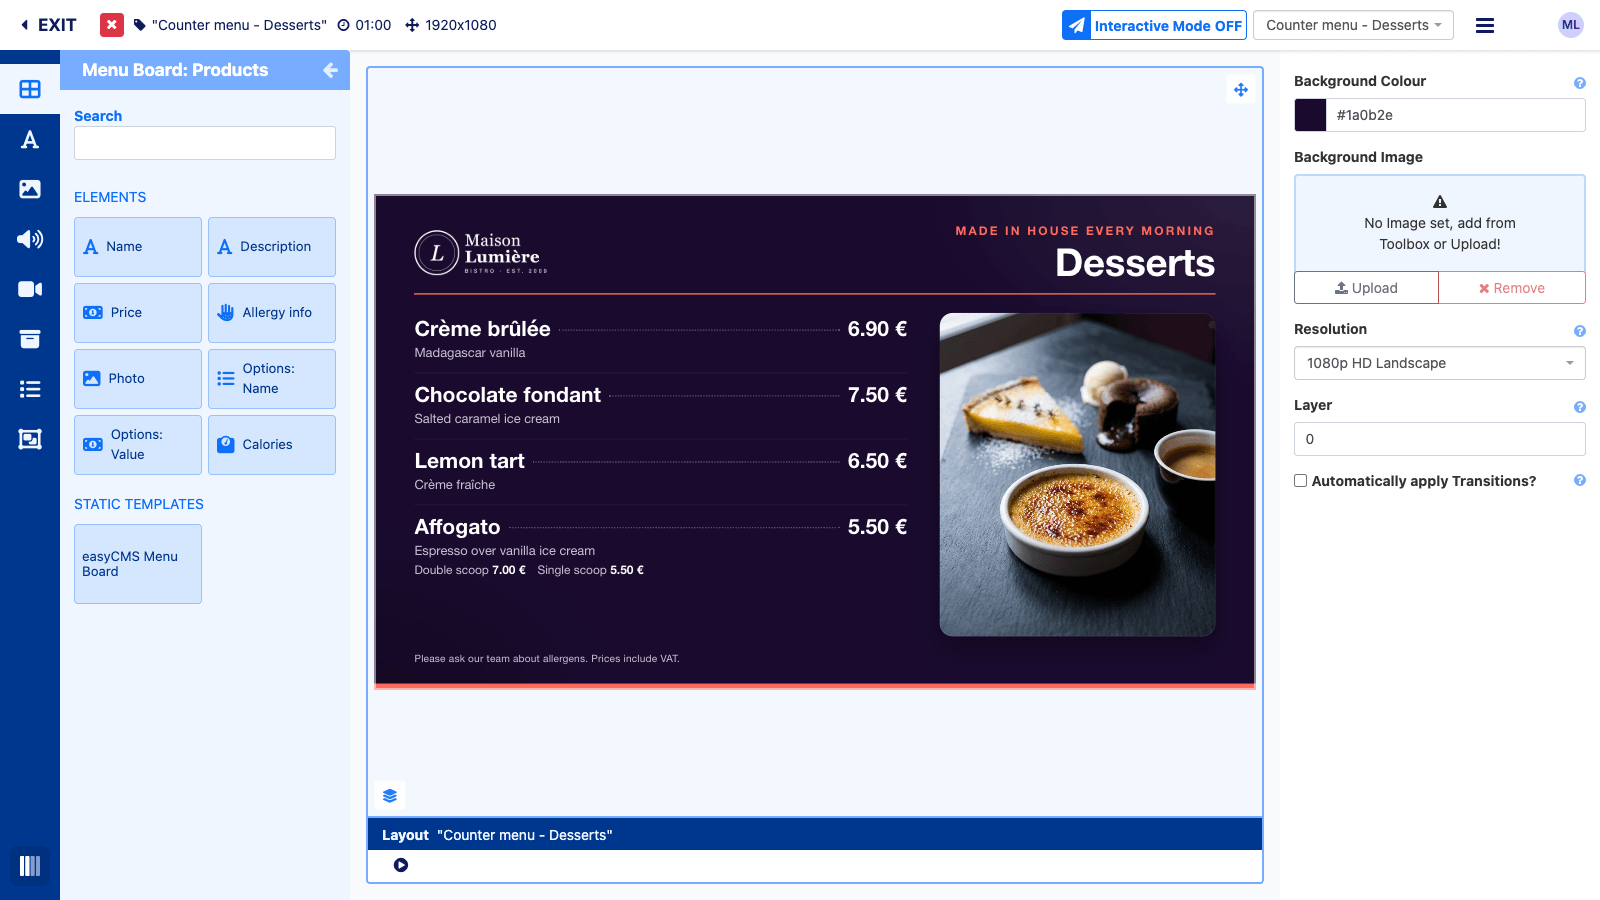 The template sits under Static Templates, below the individual elements.
Make it full screen
The template arrives as a small square in the middle of the canvas.
- With it selected, open the Positioning tab, the grid icon to the right of Advanced in the panel on the right.
- Click Make this full screen.
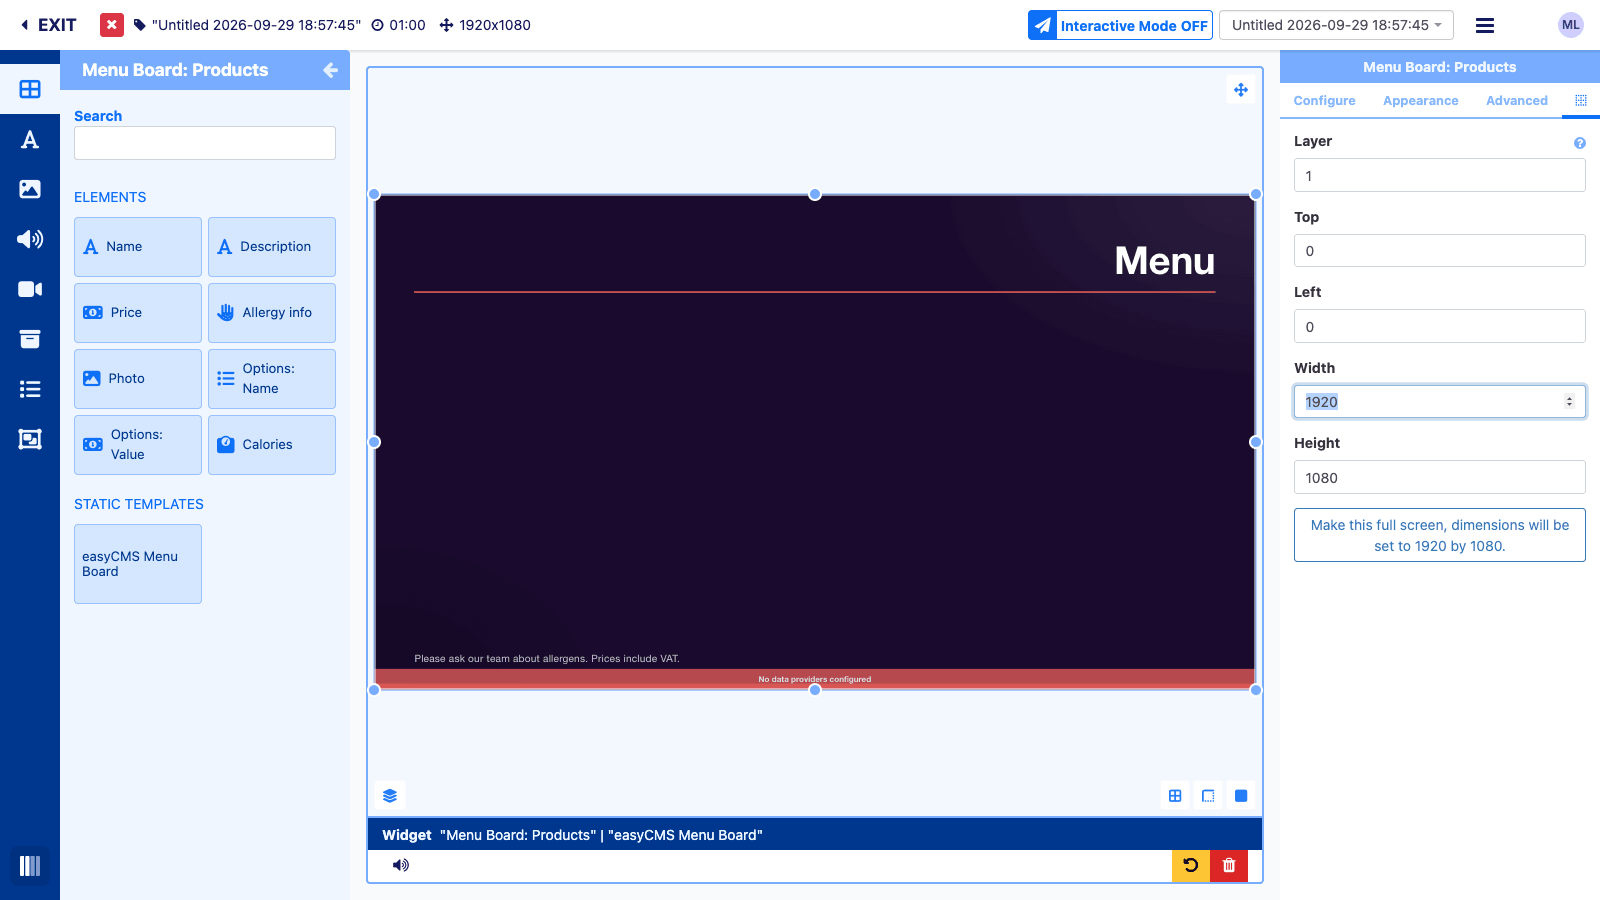 Until you choose a menu, the canvas shows “No data providers configured”. That is expected.
Choose the menu
On the Configure tab:
- Menu: pick your menu board.
- Category: pick the category this screen shows.
- Sort by: leave it on Display Order, so dishes follow the numbers you gave them.
- Show Unavailable Products?: tick it if a sold-out dish should stay on the board, marked as sold out. Leave it unticked and sold-out dishes disappear from the screen until you switch them back on.
Leave the row limits alone. They are for splitting one long category across two screens.
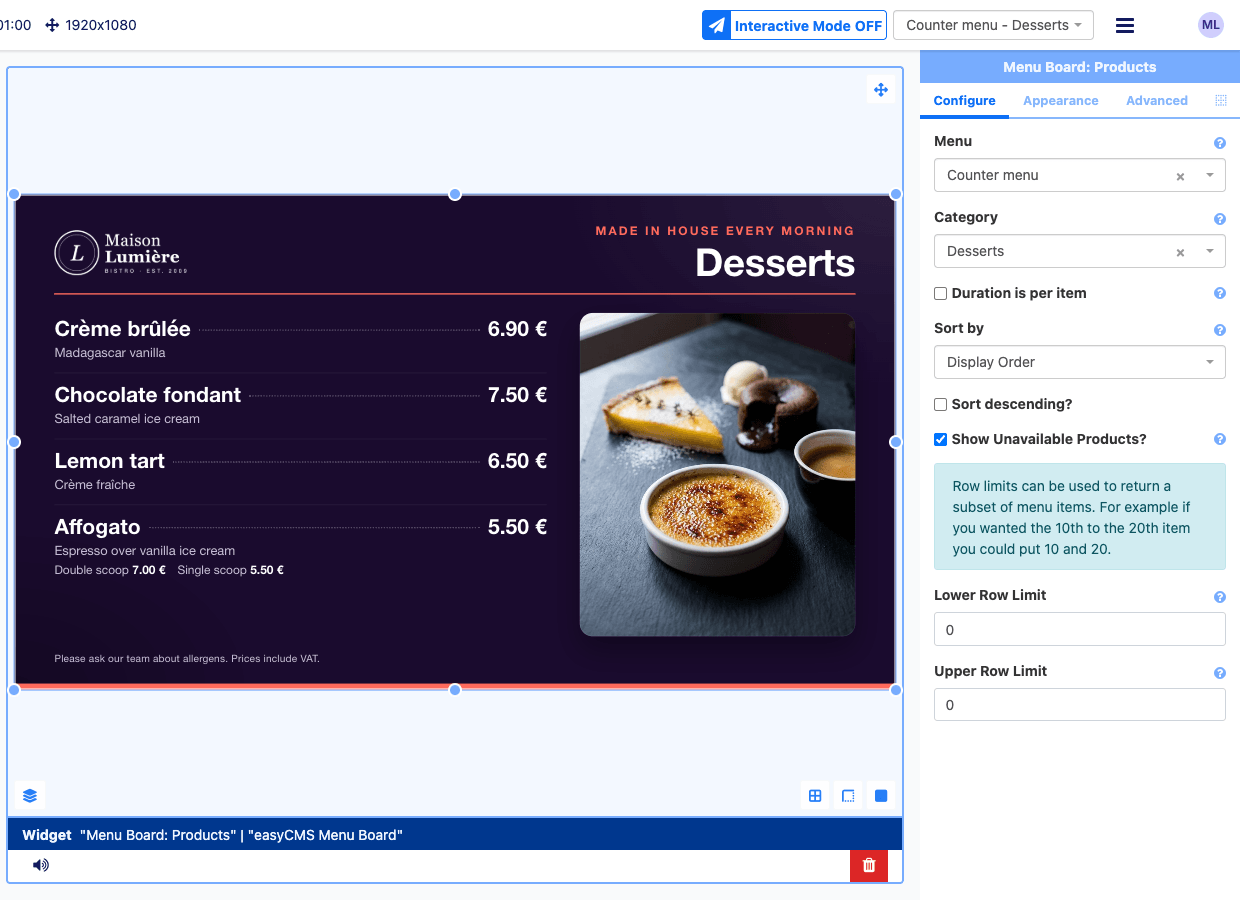 As soon as a category is chosen, the canvas shows the real dishes and prices.
Add your logo and style it
The Appearance tab holds everything that makes the board yours. You set it once.
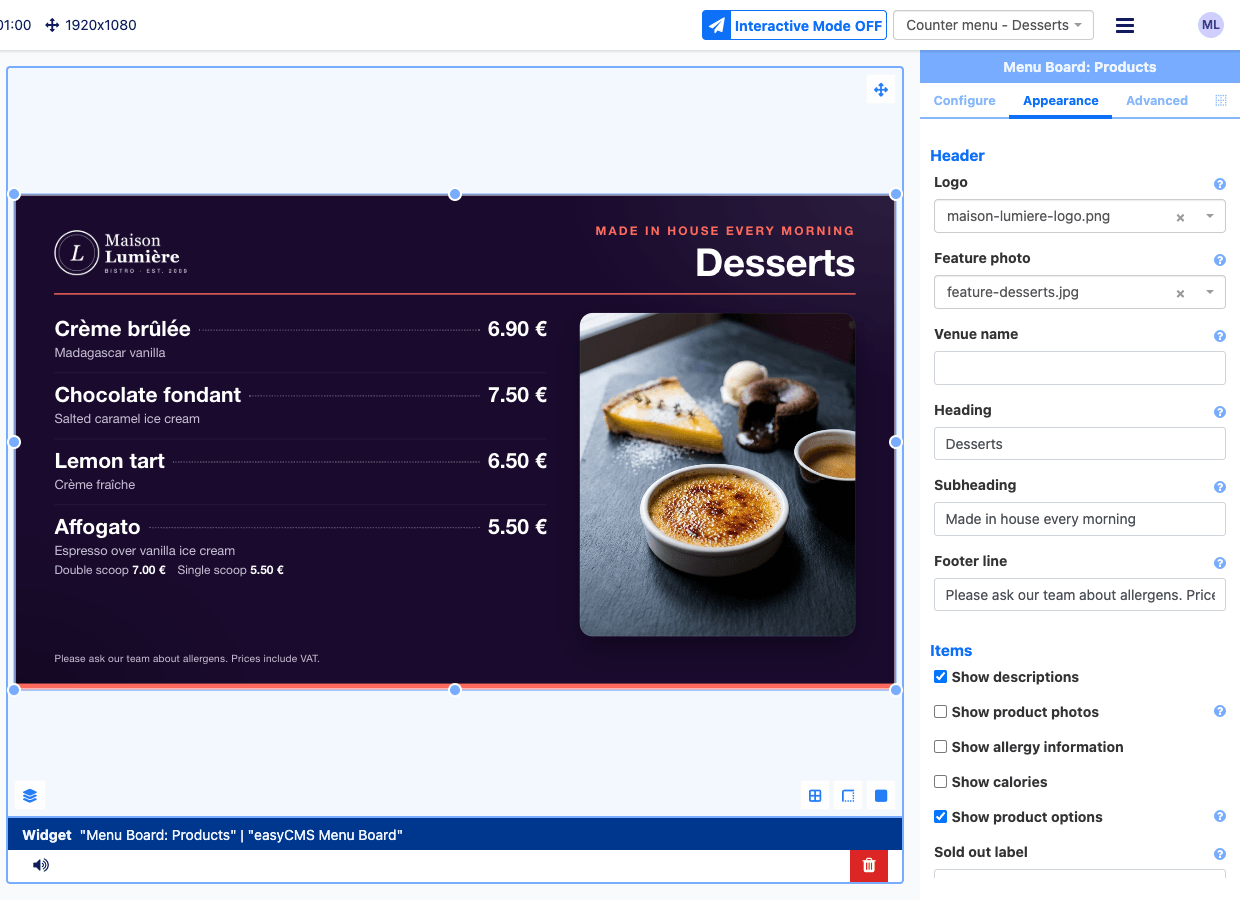 The logo and feature photo are picked from your Library.
| Setting | What it does |
|---|---|
| Logo | Your logo from the Library, top left. |
| Feature photo | An optional photo panel on the right. Leave it empty for a full-width list. |
| Venue name | Shown top left when there is no logo. |
| Heading and Subheading | The big title and the line above it, such as “Desserts” and “Made in house every morning”. |
| Footer line | Small print along the bottom, such as a note about allergens or VAT. |
| Show descriptions, photos, allergy information, calories, product options | What each dish shows under its name. |
| Sold out label and Allergens label | The wording on screen. Translate them here for a French, German or Spanish board. |
| Unavailable products | How sold-out dishes look: dimmed, dimmed with a Sold out tag, or with the price struck through. |
| Columns | Automatic switches to two columns for long lists without a feature photo. |
| Items per page and Seconds per page | How many dishes a page holds at most, and how long each page stays up. |
| Currency symbol, Symbol position, Decimal separator | 14.50 €, €14.50 or 14,50 €. |
| Font and colours | Background, accent, text, secondary text and price colours. Start from your brand colours. |
With Show product photos ticked, each dish gets its own picture and the feature photo is usually left empty.
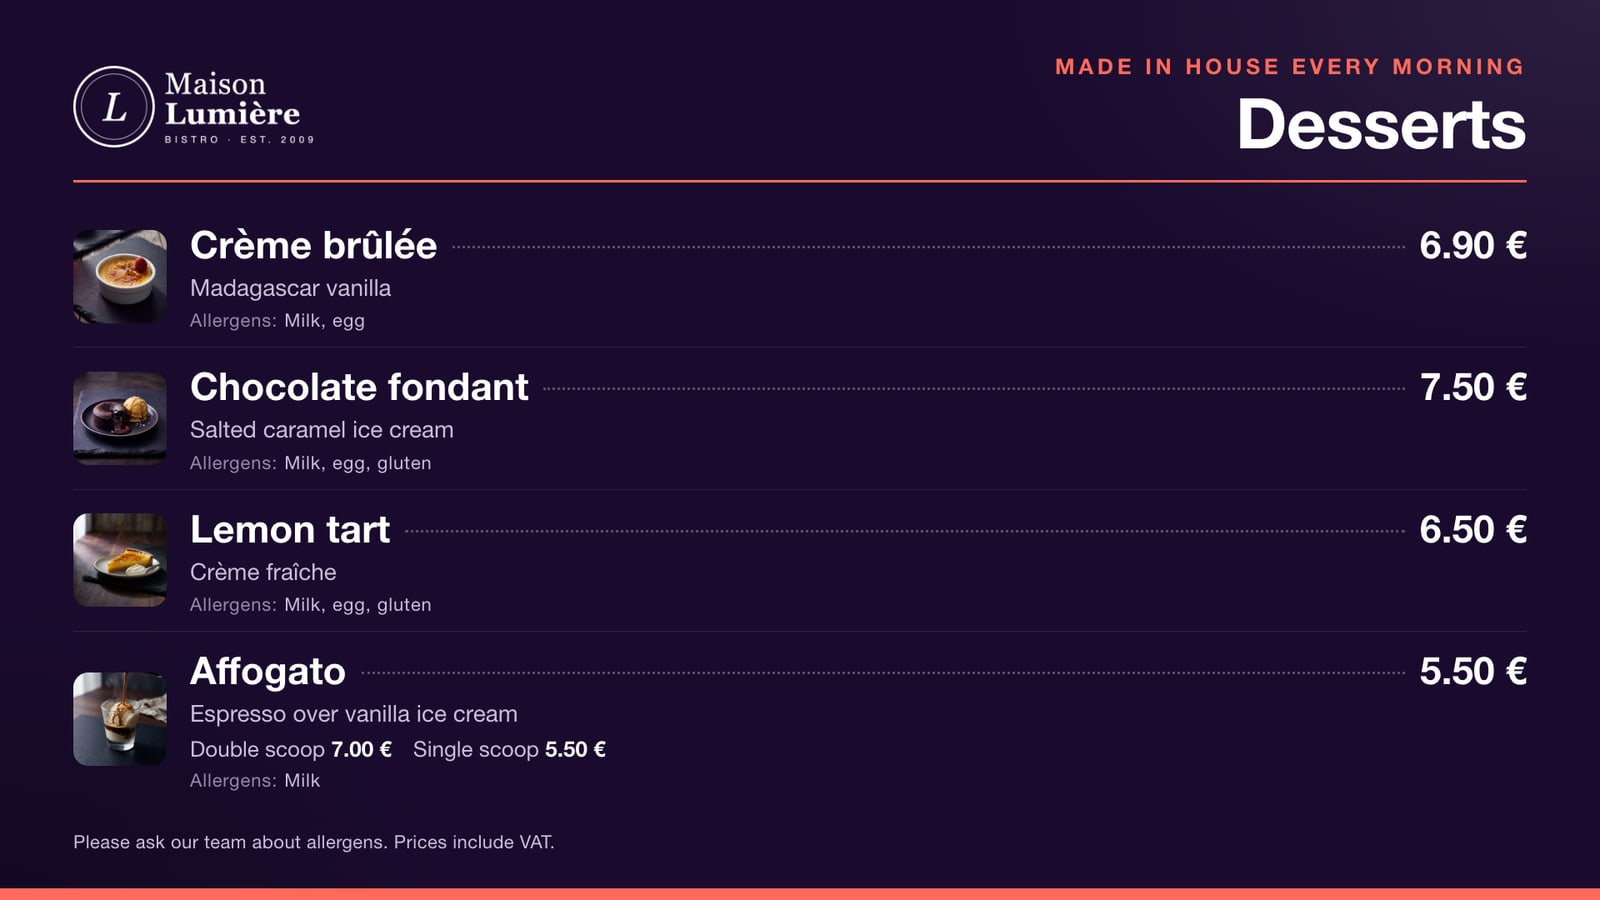 Product photos and allergy information switched on. The dishes come from the same menu.
When the category does not fit on one screen
The template never squeezes text to make it fit. When a category has more dishes than fit, it splits them into pages and moves to the next page every Seconds per page. Keep the layout’s duration at least as long as all the pages together, or the last page never shows. Two pages at 12 seconds need at least 24 seconds.
Fewer dishes per screen reads better anyway. If a category keeps running to three pages, split it across two screens with the row limits, or into two categories.
Step 5: Publish and schedule
A layout plays nowhere until it is published:
- Open the three-line menu at the top right of the editor.
- Choose Publish.
Then put it on the screen, either as the display’s default layout or with a schedule. Scheduling your first content covers both. To show a breakfast menu in the morning and dinner in the evening, schedule one layout per service. See timezones and dayparting.
Changing prices and dishes later
Go back to Library > Menu Boards, open the category’s products, and edit the dish:
- New price: edit the product, change Price, Save.
- Sold out: edit the product, switch Availability off, Save. Switch it back on when it returns.
- New dish: Add Product in the right category, with a Display Order that puts it where you want it.
You do not open the layout or publish anything again. Every screen showing that category picks the change up at its next check-in. That is usually within a few minutes, not instantly, so change a price before service rather than while the queue is at the counter.
Watch out Allergy information on screen supports your process. It does not replace the allergen documentation your local rules require. Keep the paper version current and make one person responsible for both.
Building your own design
The template covers most restaurants. For a portrait screen or a design of your own, build the board from elements instead:
- Menu Board: Products has elements for the Name, Description, Price, Allergy info, Photo, Calories, and Options: Name and Options: Value.
- Menu Board: Category has elements for the category Name, Description and Category Photo, which is handy for headers.
Drag the elements you need onto the canvas and style each one in its Appearance tab. Placing the same element several times shows the next dish in each copy. Creating layouts covers elements in more depth.
If something looks wrong
- The canvas says “No data providers configured”. Choose a Menu and a Category on the Configure tab.
- A dish is missing. Check that its Availability is on, or tick Show Unavailable Products?. Check that it is in the category this screen shows.
- Prices show the wrong symbol or separator. Change them under Prices on the Appearance tab. The prices in the menu stay plain numbers.
- The screen still shows an old price. The player has not checked in yet. Player connected but not updating covers what to check.
- Menu Boards is not in your Library menu, or the template is not in the Toolbox. Your account is not set up for them yet. Raise a support request and we will switch them on.
For the design side of a good board, reading distance, type size and how many dishes a screen can carry, see digital menu boards.
Related articles: Your First Layout, Scheduling Your First Content, Dynamic Content with DataSets, Timezones and Dayparting