Bien démarrer avec easyCMS
Ce que comprend votre compte easyCMS, comment vous connecter à easyCMS Studio, et les trois étapes qui vous mènent d'un nouveau compte à votre premier écran en diffusion.
Votre compte est actif dès que votre commande est finalisée. Vous gérez vos écrans dans easyCMS Studio à l’adresse app.myeasycms.com/studio, sur un téléphone, une tablette ou un ordinateur. Ce guide explique ce que vous avez acheté, comment vous connecter, et les trois étapes jusqu’à votre premier écran en diffusion.
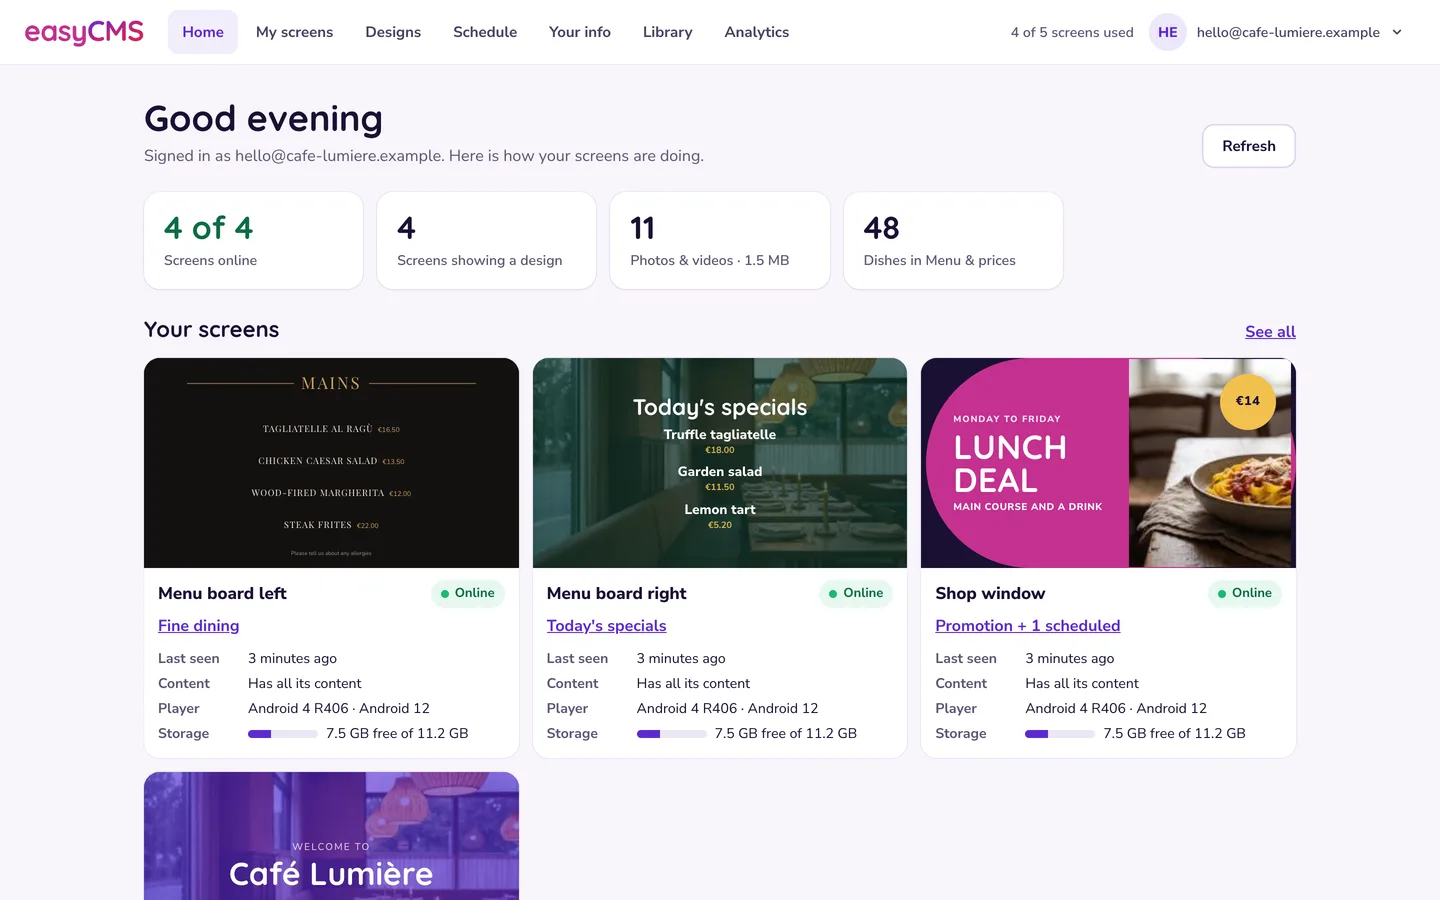 La page Home de Studio. Chaque écran que vous possédez, s'il est en ligne, et une image de ce qu'il affiche.
Gardez votre e-mail de bienvenue Il contient votre nom d’utilisateur et votre mot de passe Studio, ainsi que l’adresse du CMS et la clé du CMS qu’un lecteur demande quand vous connectez un écran. Vous l’avez perdu ? Demandez-nous de vous le renvoyer.
Ce que comprend votre compte
Le compte standard coûte 49€ une seule fois, sans abonnement mensuel :
| Inclus | |
|---|---|
| easyCMS Studio | Plus de 200 modèles prêts à l’emploi, hébergés et mis à jour par nos soins |
| Licences écran | 1, de quoi équiper votre premier écran |
| Écrans | Jusqu’à 5 |
| Stockage | 1GB pour vos photos et vos vidéos |
Chaque écran supplémentaire nécessite une licence : 99€ une seule fois, ou 66€ si elle est achetée dans la même commande que le compte. Au-delà de cinq écrans, le compte PRO (299€ une seule fois) en gère jusqu’à 25 avec 5GB. Une licence couvre un écran. Tout est sur la page des tarifs.
Se connecter à Studio
- Ouvrez app.myeasycms.com/studio.
- Connectez-vous avec le nom d'utilisateur et le mot de passe de votre e-mail de bienvenue.
- La première fois, Studio vous demande Où sont vos écrans ? (un restaurant, un commerce, un bureau…). Ce choix décide des modèles que vous voyez en premier et n’en cache jamais aucun. Modifiez-le plus tard sous Votre activité dans le menu du compte.
Astuce Sur un téléphone, utilisez l’option Ajouter à l’écran d’accueil de votre navigateur. Studio est alors à portée d’un toucher, comme une application.
Les pages que vous utiliserez
Sur un téléphone, ces pages se trouvent dans une barre d’onglets en bas de l’écran.
| Page | À quoi elle sert |
|---|---|
| Accueil | L’état de vos écrans |
| Mes écrans | Chaque écran et ce qu’il affiche ; Ajouter un écran en connecte un nouveau |
| Designs | Choisissez un modèle, personnalisez-le, diffusez-le |
| Planification | Ce que chaque écran diffuse, et quand |
| Your info | Nom de l’établissement, logo, horaires, Wi-Fi et équipe, saisis une fois pour tous les designs (Menu & prix se trouve juste à côté pour la restauration) |
| Bibliothèque | Vos photos, vidéos et playlists |
| Statistiques | Ce qui a été diffusé, où et pendant combien de temps |
Votre premier écran en trois étapes
- Ajoutez l’écran. Installez le lecteur, puis suivez Ajouter un écran dans Mes écrans. Voir connecter votre premier écran.
- Créez un design. Dans Designs, touchez Nouveau design, choisissez un modèle et tapez vos textes par-dessus. Voir votre premier design.
- Diffusez-le. Touchez Play on…, cochez les écrans, choisissez quand, et appuyez sur Send. Voir mettre votre design sur un écran.
Vous pouvez remplir Vos infos et commencer un design avant qu’un écran soit connecté : rien n’arrive sur un écran tant que vous ne le diffusez pas.
Combien de temps prend un changement
Les lecteurs téléchargent chaque modification et la diffusent depuis leur propre stockage : c’est pourquoi les écrans continuent de diffuser quand Internet est coupé. Une petite modification arrive en quelques instants ; une grosse vidéo sur une ligne lente prend quelques minutes. Mes écrans indique où en est chaque écran : attendez « A tout son contenu » avant de conclure que quelque chose ne marche pas.
Vous utilisez déjà easyCMS classique ?
easyCMS classique est toujours là : choisissez Passer à easyCMS classique dans le menu du compte de Studio. Les mises en page créées là-bas continuent d’être diffusées là où elles sont planifiées, et les guides créer des mises en page et planifier du contenu les expliquent. Vous voulez qu’une mise en page classique soit refaite en design Studio ? Demandez-nous : nous le faisons gratuitement.
Ajouter d'autres écrans plus tard
Achetez une licence si vous n’en avez plus de libre, installez le lecteur et utilisez à nouveau Ajouter un écran. Voir ajouter un nouvel écran.
Si quelque chose se comporte autrement que dans ce guide, envoyez-nous une demande d’assistance.
Articles liés : Connecter votre premier écran, Votre premier design, Mettre votre design sur un écran, Ajouter un nouvel écran à votre compte